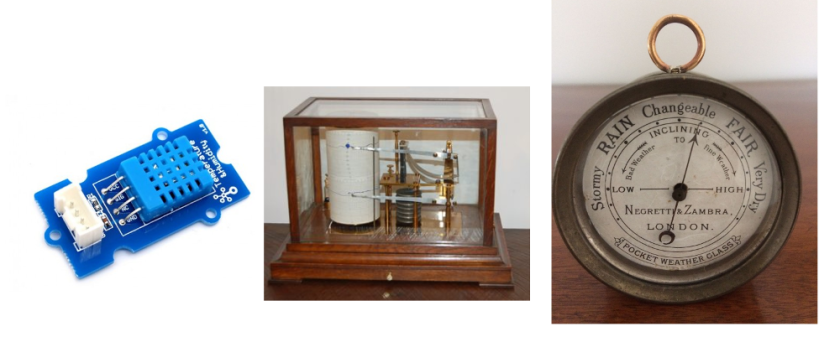
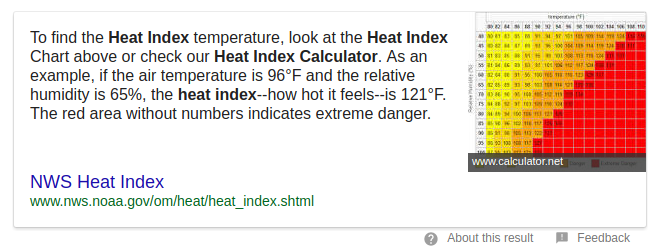
People have long been fascinated with measuring and attempting to predict the weather. Weather is a challenge because it involves so many variables: temperature, wind speed and direction, humidity (how much moisture is in the air), barometric pressure and seasonal changes. The first serial sensor we will work with is a Grove Temperature and Humidity Sensor.

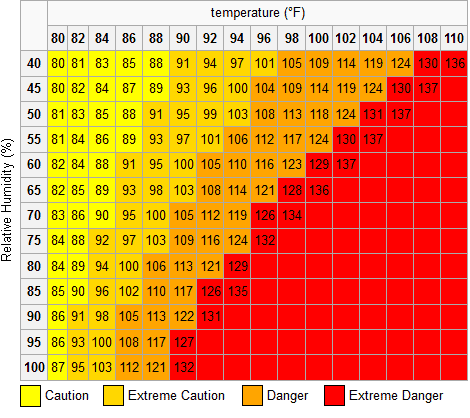
High humidity can not only be uncomfortable (by making you feel hotter) but it can also be dangerous: when doing hard work in high humidity it is advised to drink lots of fluids and take plenty of breaks in the shade. It can cause heat exhaustion and heat stroke; which is life threatening. Thus, having the means to measure humidity can be a valuable safety measure.
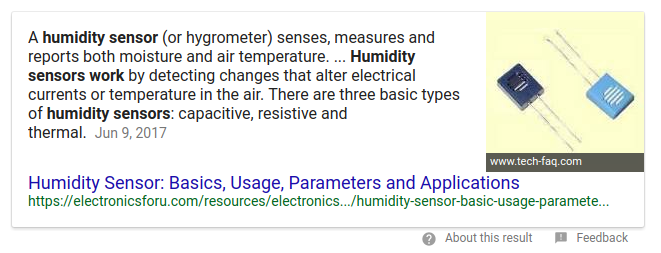
HDT11 Temperature Humidity Sensor
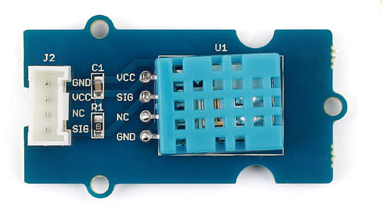
The DHT11 Temperature Humidity sensor is an inexpensive weather sensor. It is capacitive and thermal.

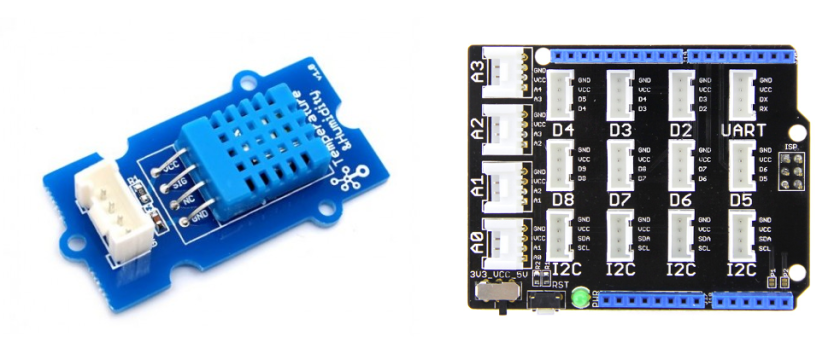
Connect the Grove Humidity Sensor to the Grove shield to port A0. As with most complex sensors, this one has its own library which we have loaded for you.
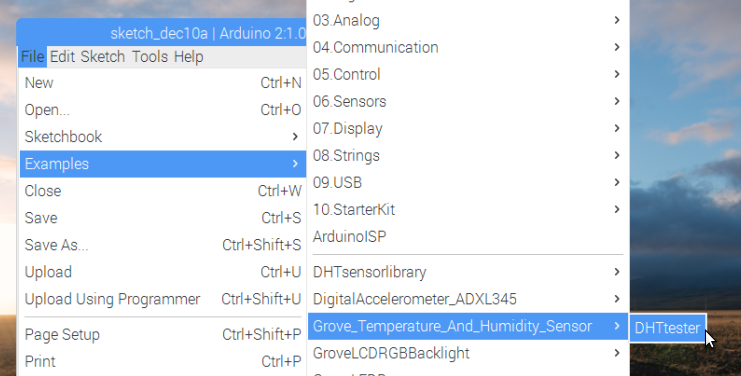
Open your Arduino IDE and go to File/Examples/Grove _Temperature_And_Humidity_Sensor/DHTtester and load the sketch.
// Example testing sketch for various DHT humidity/temperature sensors
// Written by ladyada, public domain

#include "DHT.h"#define DHTPIN A0 // what pin we're connected to
// Uncomment whatever type you're using!
#define DHTTYPE DHT11 // DHT 11
//#define DHTTYPE DHT22 // DHT 22 (AM2302), AM2321
//#define DHTTYPE DHT21 // DHT 21 (AM2301)

// Connect pin 1 (on the left) of the sensor to +5V
// NOTE: If using a board with 3.3V logic like an Arduino Due connect pin 1
// to 3.3V instead of 5V!
// Connect pin 2 of the sensor to whatever your DHTPIN is
// Connect pin 4 (on the right) of the sensor to GROUND
// Connect a 10K resistor from pin 2 (data) to pin 1 (power) of the sensor

// Initialize DHT sensor.
// Note that older versions of this library took an optional third parameter to
// tweak the timings for faster processors. This parameter is no longer needed
// as the current DHT reading algorithm adjusts itself to work on faster procs.
DHT dht(DHTPIN, DHTTYPE);

void setup() {
Serial.begin(9600);
Serial.println("DHTxx test!");

dht.begin();
}

void loop() {
// Wait a few seconds between measurements.
delay(2000);

// Reading temperature or humidity takes about 250 milliseconds!
// Sensor readings may also be up to 2 seconds 'old' (its a very slow sensor)
float h = dht.readHumidity();
// Read temperature as Celsius (the default)
float t = dht.readTemperature();
// Read temperature as Fahrenheit (isFahrenheit = true)
float f = dht.readTemperature(true);

// Check if any reads failed and exit early (to try again).
if (isnan(h) || isnan(t) || isnan(f)) {
Serial.println("Failed to read from DHT sensor!");
return;
}

// Compute heat index in Fahrenheit (the default)
float hif = dht.computeHeatIndex(f, h);
// Compute heat index in Celsius (isFahreheit = false)
float hic = dht.computeHeatIndex(t, h, false);

Serial.print("Humidity: ");
Serial.print(h);
Serial.print(" %\t");
Serial.print("Temperature: ");
Serial.print(t);
Serial.print(" *C ");
Serial.print(f);
Serial.print(" *F\t");
Serial.print("Heat index: ");
Serial.print(hic);
Serial.print(" *C ");
Serial.print(hif);
Serial.println(" *F");
}
Note: this code is written for 3 different types of sensors, so you will need to uncomment DHT11 and comment the other ones.
// Uncomment whatever type you're using!

#define DHTTYPE DHT11 // DHT 11
//#define DHTTYPE DHT22 // DHT 22 (AM2302), AM2321
//#define DHTTYPE DHT21 // DHT 21 (AM2301)
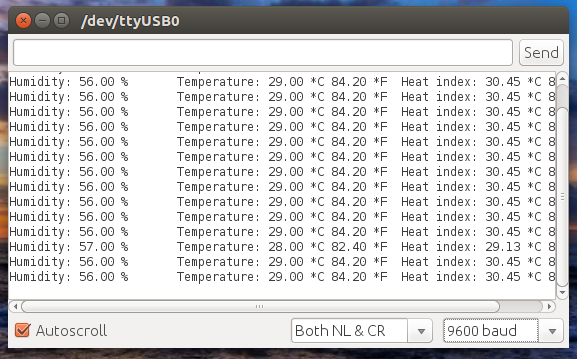
Go ahead and run the sketch. Open the serial monitor and make sure it is set to 9600 baud. You should observe this display:
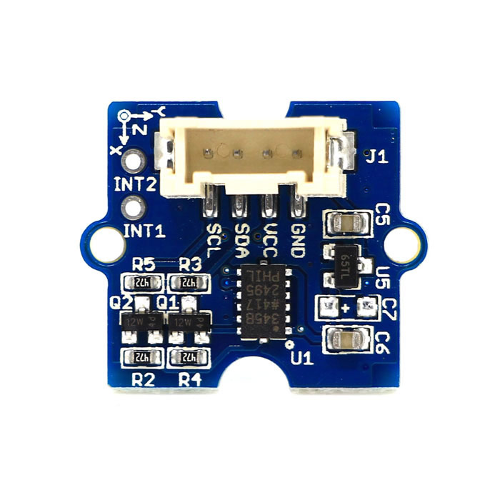
3-Axis Accelerometer
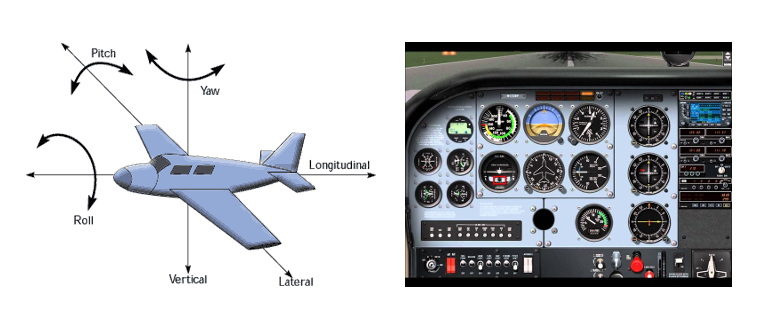
Aircraft have a lot of positional data to monitor in order to stay in flight. The pitch determines whether the nose is pointing up, down or horizontal or any degree in between. The roll is a measure of how level the craft is from left to right. The yaw is the compass direction the plane is pointed. Just a glance at the cockpit of a typical airplane suggests there is a lot of electronics invested to manage this.
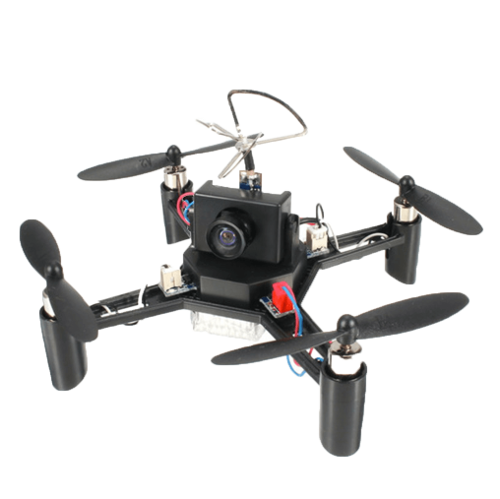
Even a small toy drone requires some sophisticated technology to track its position and movement. Most have a tiny gyroscope and accelerometer. The gyroscope helps indicate orientation. In comparison, the accelerometer measures linear acceleration based on vibration. Sensors that can do this use MEMS (Micro-Electro-Mechanical-Systems) technology.
The parts of a MEMS sensor are smaller than the diameter of a human hair. They are etched in silicon using photographic lithography.
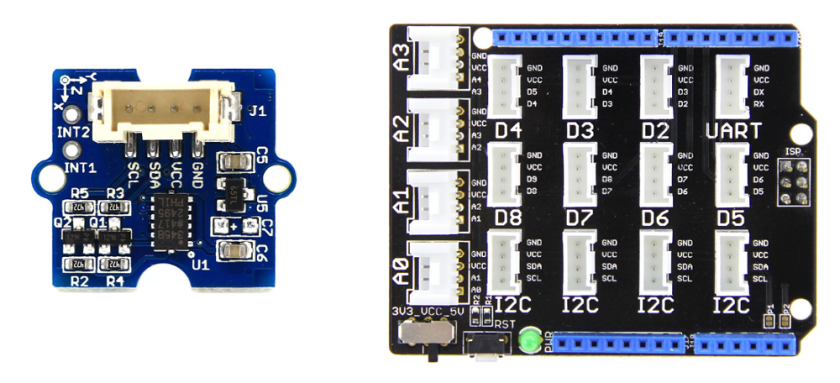
Connect the Grove 3-Axis Accelerometer to the Grove shield to one of the I2C ports. I2C is a chip-to-chip serial protocol. This sensor has its own library which we have downloaded for you.

In your Arduino IDE, go to Examples/DigitalAccelerometer_ADX345/ADX345_demo_code and run the sketch. It is a long and complicated sketch; it is work looking over; it took a lot of skill to create (and is over my head in parts).
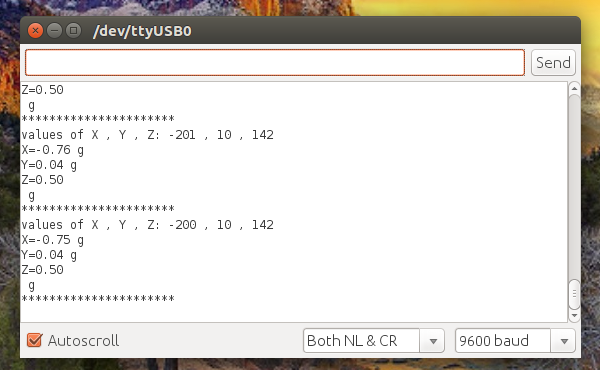
Open the serial monitor (9600 baud) and observe the display as you manipulate the sensor. Try to move it in only one dimension at a time.
Do This At Home

These are the libraries we used in this project:
Install Grove Temperature and Humidity Sensor Library:
https://github.com/Seeed-Studio/Grove_Temperature_And_Humidity_Sensor
https://github.com/adafruit/Adafruit_Sensor
http://wiki.seeedstudio.com/wiki/File:DigitalAccelerometer_ADXL345.zip
